A Raspberry-Pi driven Electronic Valve Instrument –
“Rasp-EVI”
Updated: 4 Sept 2018
Note Sept ’18: After building the Rasp-EVI to the stage shown below, I played it on and off for a while, and finally decided that the EVI fingering was not for me. I haven’t done any further development on it.
Background
I’ve been playing a couple of types of electronic wind controllers for a few years now, but I’ve never had an EVI – an Electronic Valve Instrument. It’s like an electronic trumpet. Those who have them think they are terrific, so obviously I NEEDED one. I saw in the Patchman wind controller forum that, apparently, no-one is making them any more, so I said, “how hard can it be?”…..
Status
This instrument is at the prototype stage. It plays, but needs work. The next version will look a lot better. I will keep this page updated as the project develops
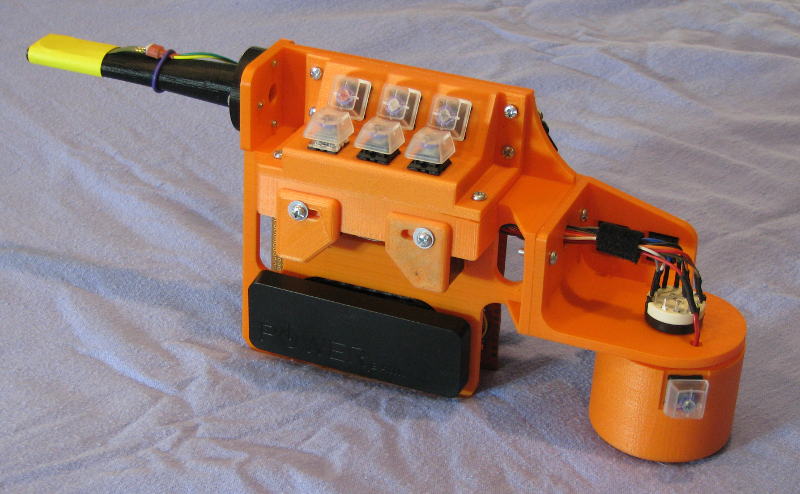
It currently looks like this:
Features
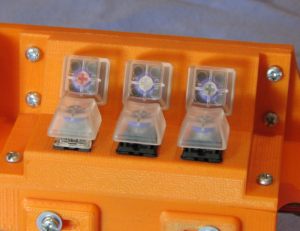
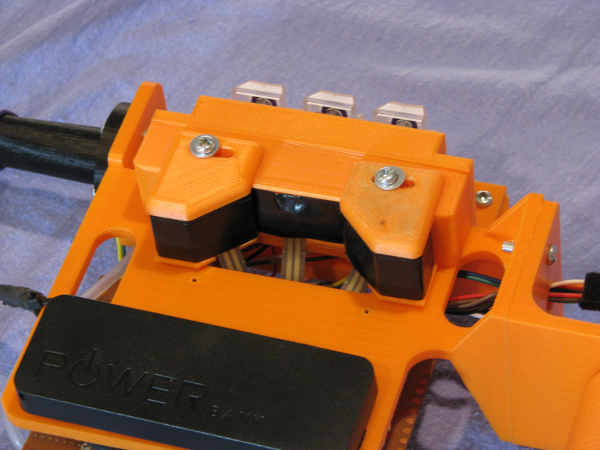
Keys
I have generally kept to the Nyle Steiner design from the point of view of keys i.e. 3 main “valve” keys with 3 “trill” keys and a “-5” key (to switch between C and the G below). What I didn’t want to do was use was touch sensitive ones. “Why? They’re great.”, I hear all the EVI aficionados cry! Well, I have an AKAI EWI-USB with touch sensitive keys, and I like them, but every now and then they don’t work properly because your hands aren’t moist enough, or whatever. I had a look around to see if I could get industrial-type touch sensors which would likely be more reliable, but they were very expensive, and fairly large. I’ve recently bought a Roland Aerophone which has “clicky” keys, an actuation force of about 100g and a travel of just over 1mm. I like the tactile feedback, but not the noise, and the actuation force is just a bit high for my liking. So I started looking at quiet tactile switches with low operating force…
What I settled on are computer keyboard keys. To be precise, I selected Cherry MX Brown keys. They have tactile feedback, low force actuation (55g), and no click. They travel 3mm (after I used silicone o-rings to limit the travel and noise). Cherry MX are liked by computer gamers because they feel good, and they are very reliable. I discovered that they are also very cheap. You can get a large range of Cherry MX keys with different force/click/tactile characteristics and they are all colour-coded so you know which ones you have. I actually bought a “tester” kit with 9 different Cherry keys to see which ones I liked best – it made the choice much easier.
Octave Canister

The octave canister
On other EVIs the canister is used to guide the left thumb across the touch-sensitive thumb keys. I have dispensed with these keys and am using the canister rotation to actuate a 12-position rotary switch. The drum “clicks” into position as you change octaves. I have limited the switch’s movement to 7 positions (zero +/- 3 octaves). The movement-per-click is a bit less than 30 degrees, which is higher than I wanted, but I thought I’d give it a try. The whole range is therefore covered by 180 degrees of movement, which is a lot. However, in normal use I find that one octave below and two octaves up are what I use mostly use, so that’s a total movement of 90 degrees – probably OK. I made the canister adjustable on the switch spindle, so I can position the “-5” key where I like.
Pitchbend, vibrato and portamento
These analogue features are implemented using force sensitive resistors (FSRs). Photo below:

They are ~13mm diameter and very thin and are sensitive to light pressure on the surface. They are used for the bend up and bend down ramps either side of the right thumb. The vibrato sensor is above the right thumb, between the up/down pitchbend ramps.
The pitchbend ramps
The portamento sensor is on the top of the mouthpiece, and is squeezed by the lips/teeth. It is protected by heatshrink – I’m not sure how durable this will be, but the principle seems to work.
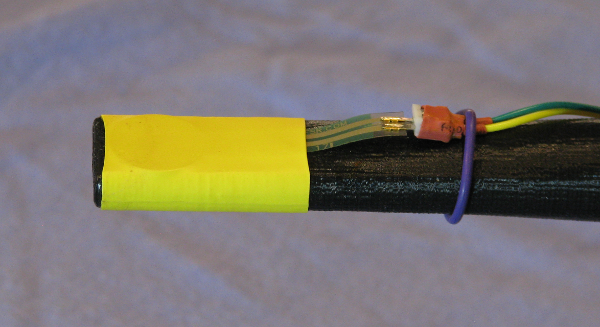
The portamento sensor
Breath Sensor
The breath pressure sensor is the same as the one in my Aerophone, and it is connected to the mouthpiece via a silicone tube. I decided to use the “dead-ended” system with no flow. This means that I need to use the “side leakage” technique to play the instrument.
The breath sensor
Control
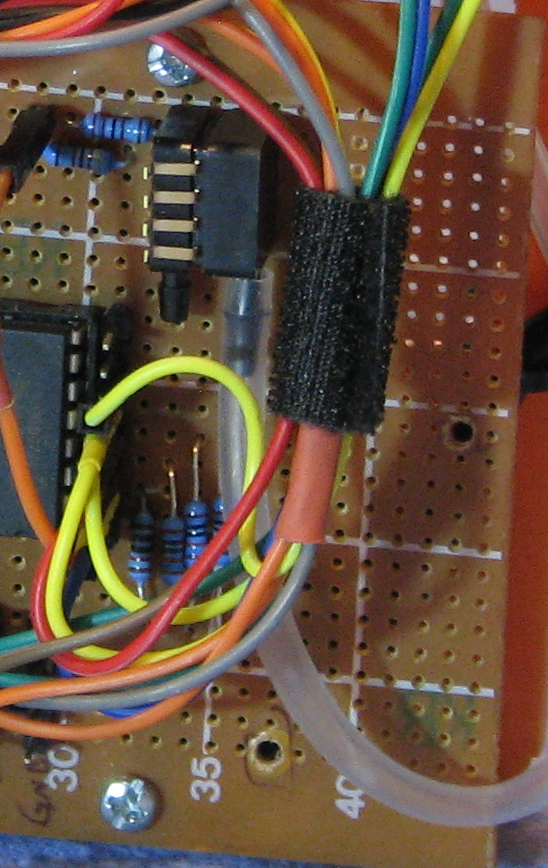
Control is provided by a Raspberry Pi. Why not something else? Maybe an Arduino? Well I chose a Pi because it has all the “extras” as standard – things like the web server, wifi, and bluetooth. Yes, you can get those features on an Arduino, but it requires a lot more programming. It is running the standard Raspbian operating system, which works successfully on my EWI-Pi with minimal latency. The computer is connected to an analogue-to-digital converter chip which is interrogated by the SPI pins on the GPIO. The A/D converter takes inputs from the 4 FSRs, the breath sensor and the fine-tune knob.The digital inputs and outputs are connected to the GPIO pins via a resistor array on the breakout board. The control program is written in Python.
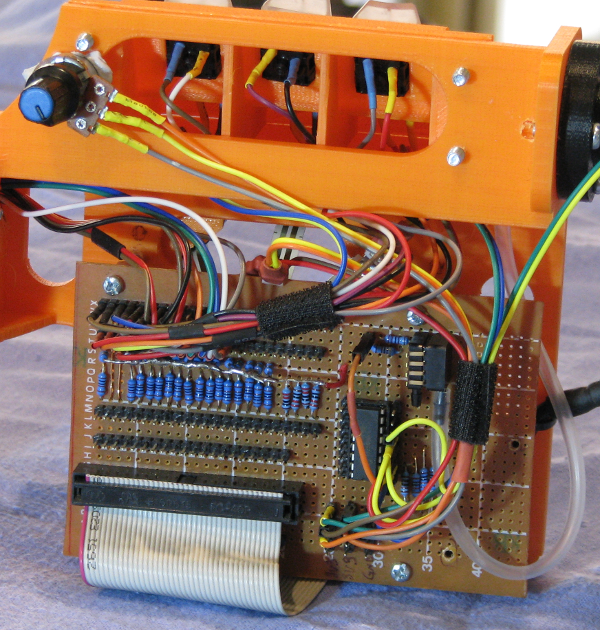
In the photo above, the computer is obscured behind the break-out board. I’m currently using an R-Pi3 that I already had, but I plan to buy a R-Pi Zero after I’ve debugged the program. The Zero takes up less than half the space, and although it is less powerful than the 3, the 3 is doing it easily, so I don’t anticipate any problems. In addition, I’m going to re-design the breakout board and make it smaller. Initially I needed it to be the size it is so I could easily fiddle with the wiring configuration.
Output
Output of MIDI commands can go two ways to get to the synth – cable or bluetooth. The instrument automatically supports use of the inexpensive USB/MIDI cable interfaces, but this means that it would be connected to the synth via a cable. The R-Pi has built-in Low Energy Bluetooth, so I have used this to connect wirelessly. The BLE comms are javascript using a package called Bleno. One thing I need to do is measure the latency – initially it seems acceptable, but I don’t have a measure of it.
Configuration
Configuration of the system is done via wifi. The R-Pi has a built-in wifi chip and this is set up so that you can connect using a phone/tablet/PC and use the on-board web server to change (and save) settings on the Rasp-EVI. In addition, the instrument has two configuration keys that, in combination with the note keys, can enable presets, send MIDI config messages to other devices, or quickly adjust things like the coarse tuning (C, Bb, Eb).
The two configuration keys
Power
The instrument is powered by a 5v 5600mAh powerbank. It gives about 5 hours’ use, and is rechargeable. All the power for the sensors comes from the R-Pi board, and it uses about 1.4 watts in total.
Frame and Components
The frame and components are 3-D printed in PLA, except for the mouthpiece, which is in ABS (It’s stronger, and I think it’s better from a hygienic point of view). The frame for the prototype has been designed to simply “hold the components in place”, and it’s the third version of layout that I’ve tried. The next iteration will enclose the electronics and it will look much more professional. The weight of the unit is 510g incl the battery. For comparison, my Aerophone is 875g.
Synth
For testing, the BLE MIDI is being sent to another R-Pi which feeds it to my hardware synth – a Roland JV-1010 with a Patchman soundbank. You can see those items on my EWI-Pi page on this site.