Raspberry-Pi powered Synthesiser
This project has been dismantled and is no longer in use.
Updated: 14 October 2018

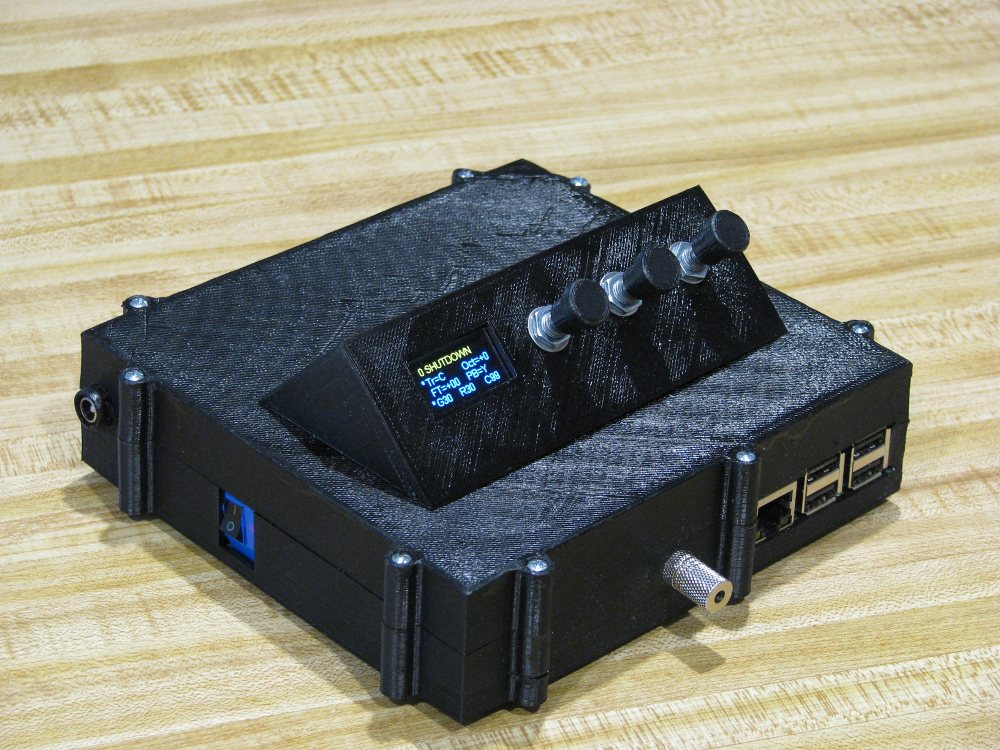
This project has evolved out of other stuff I’ve done here. It is a Raspberry-Pi 3 powered synthesiser. Why make this when I have other synths? Well, there are three reasons:
- there has been a lot of development in FluidSynth recently, and version 2 has been released. It has a number of enhancements that I wanted to try.
- the spec for MIDI over Bluetooth has now been accepted (previously only by Apple and so only for Apple devices), and the latest versions of Bluez support MIDI. What this means is that you can simply pair a Bluetooth MIDI device, and a MIDI port is instantly created in the OS. I wanted to test it.
- I had a spare R-Pi 3B left over from my Rasp-EVI project
I haven’t written a HOWTO for this project, as it is complicated and would require me to keep it up-to-date. I’m happy to answer queries via the Contact page.
Objectives:
The objectives for this synth were:
- R-Pi powered (headless)
- FluidSynth synthesiser
- BLE MIDI
- Reasonable sound quality
- Battery powered for portability
- Ability to adjust the synth without an external computer
- Compact package
Components Used:

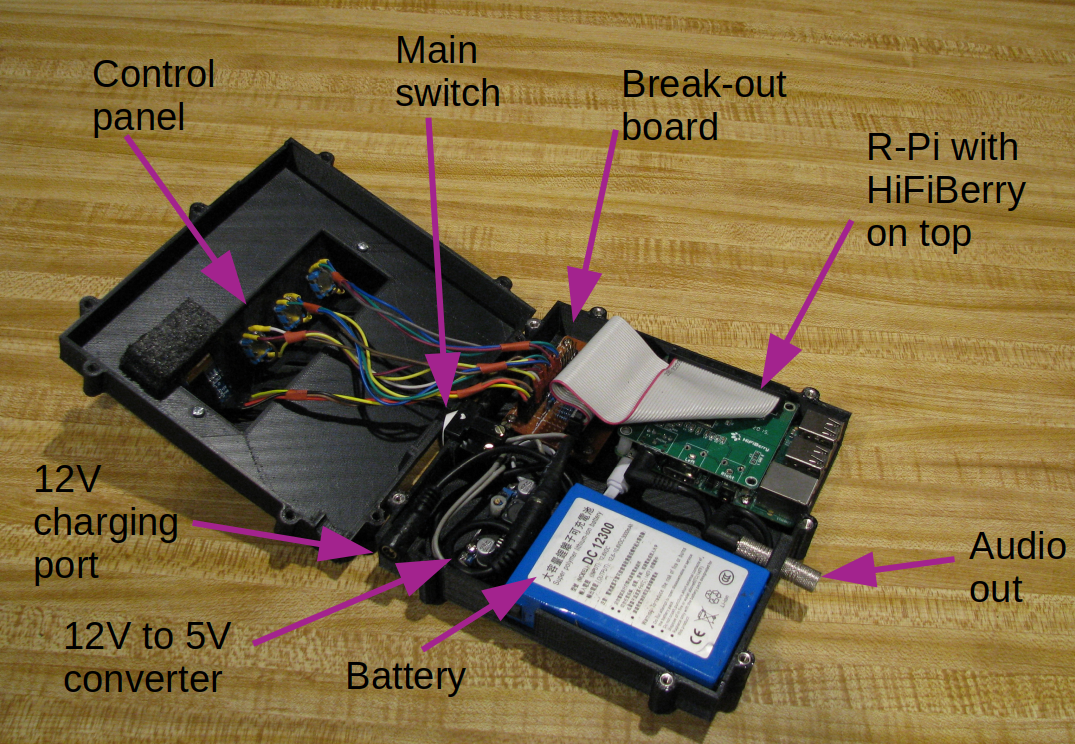
R-Pi. I used a R-Pi 3B because I had one. The latest at the time of writing is a 3B+ which is a bit faster. The unit is lightly loaded in operation, and a 2B would probably be OK
Sound Card. I used a HiFiBerry DAC+. Again, it was because I already had it. and I had already modified the card so I could access the GPIO pins with the DAC in place. I needed access to the pins to run the control panel. Testing with the HiFiBerry and other (cheap) USB sound cards has showed that, for my use, the HiFiBerry is overkill. The cheap cards perform just as well, and maybe better. The nice thing about the HiFiBerry is that it sits neatly on top of the R-Pi and is thus easy to put in a case. The USB cards would take up more room.
Battery. I bought a 12V lithium polymer 3000mAh battery for this project. To bring the voltage down to R-Pi voltage I bought a cheap adjustable 5V converter.
Break-out Board. In order to connect controls to the R-Pi I made a break-out board that connects to the GPIO pins. It has I2C connections for the display, and 10 inputs for the various controls.
Controls. I used three EC11 encoders to provide the operator interface. They can be turned clockwise and anti-clockwise as well as incorporating a momentary push switch. Each EC11 needs 3 inputs to the computer.
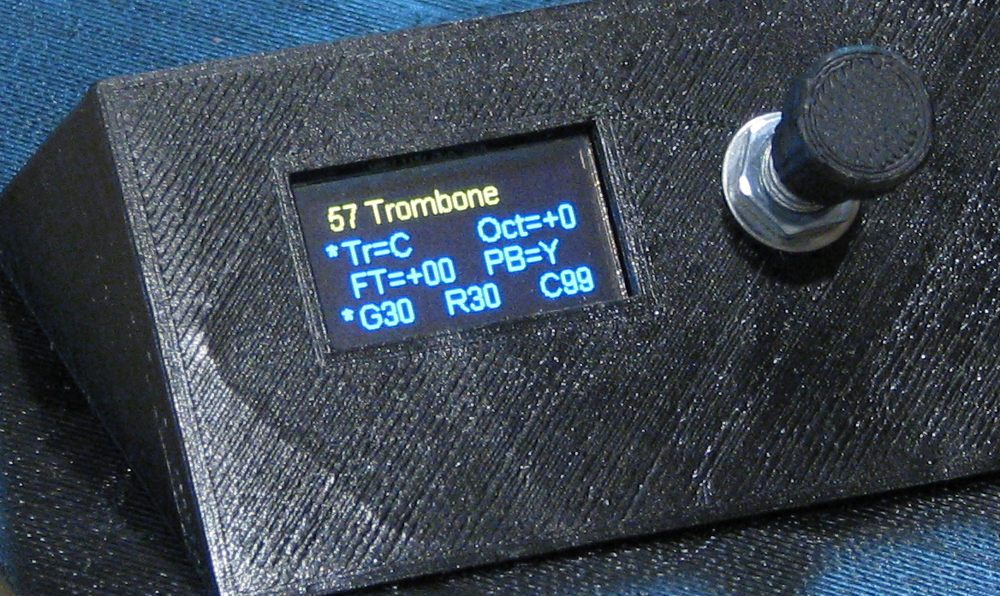
Display. I used a 128×64 I2C display. It’s really crisp and can display graphics and text. I’m using four lines of text.
Case. I built a case using my 3D printer. I used ABS because I had it in black, but I experienced issues with the case lifting off the heated bed, and as a result, the case is not as square as I’d like. If I were doing it again, I’d use PLA, which is much more forgiving.
Software:
Raspbian. I used the standard Raspbian OS
FluidSynth. I downloaded and compiled the first stable version (2.0.0). That version is not available via the Raspbian repositories yet.
Soundfont. This is the tricky bit. Getting a good-sounding soundfont is not easy. I used S Christian Collins’ excellent GeneralUser GS 1.471 soundfont, pulled out the instruments I wanted, and put them into my own soundfont package. I had to install CC2 (breath) modulators for each instrument, as the originals used CC11 (expression) for volume control. I used Polyphone for that process.
Bluez. I downloaded the latest Bluez (5.50), compiled and installed it. I needed to change the symlink for bluetoothd to get the correct version running (the symlink was pointing at the old version).
Router. I needed something to send the MIDI commands from the wind controller to the synth. I used the router program from my EWI-Pi setup, and modified it to use the Bluetooth MIDI ports. It also needed to accept input from the control panel, so I wrote some software to do that. It is written in Python.
Control Panel. The control panel needed to display the state of the synth and to accept commands to adjust settings. Again, I wrote a program in Python to do that.
How it works:
When the unit powers up, it does the following:
- The ALSA system is configured for whatever sound card is being used
- FluidSynth is started and the soundfont is loaded
- When FluidSynth is up and running,
- the control panel program is started (runs in background)
- the router program is started (runs in background)
The router program loads a configuration that sets transposition, octave, fine-tuning, and allowing pitchbend. It then waits until an MIDI input port appears. This MIDI can be
- the Akai EWI plugged into the USB port
- the Roland Aerophone plugged into the USB port
- the Yamaha UD-BT01 MIDI adapter connected via Bluetooth (the adapter can be connected to any MIDI device)
Once the MIDI port becomes active, the program starts routing MIDI commands to the synth. The commands are “tweaked” using the transpose/octave/finetune/pitchbend settings previously loaded. The router program can also receive a signal from the control panel program that it has updated these settings, and the router program will re-load the latest settings.

The control panel program waits for input from the user, who can change:
- the instrument voice via the first knob
- the router configuration via the second knob (transpose/octave/fine-tune/pitchbend)
- the synth configuration via the third knob (gain/reverb/chorus)
These changes are made via the three knobs. Items 1 and 3 above are communicated immediately to the running synth via a Telnet connection, and item 2 is communicated to the router program via a dummy MIDI command. All changes are also saved immediately, so that on a re-start the synth resume in its last state.
How does it work?
Well, it’s good. Latency is low but it’s not as good as the BluePy solution for my EWI-Pi (although I haven’t measured it). The controls work well, and the R-Pi is handling it easily. I’m still working with the reverb/chorus to fine tune the settings. The sound is OK, but it is very dependent on the quality of the soundfont, which is a very complicated thing to tweak (for me, anyway). Physically, it’s turned out to be a really good size – easily transportable for travel situations.