Updated 13 Oct 2024
Update: I’ve just pulled the midiSax apart to use the bits on my e-WB. I’ll leave the info here for posterity….
I’ve had a few MIDI wind controllers, both bought and home-made. You can see a few of them on this site. They all have their quirks, good and bad. In mid 2020 I was looking for something to keep me busy, and I decided, with the valuable encouragement/analysis/suggestions of my German colleague, Petra, to put some real effort into building my own wind controller. Thanks also go to Johan (Berglund Instruments – NuRAD) for his help with programming the touch-sensitive keys.
This page records the stages in the development of the instrument. I’m happy to respond to queries about it, but I have no desire to make one for anyone else!
Characteristics
The key characteristics of the project are listed in the table below, where I compare the features of my Aerophone AE-10 and my EW-USB.
| Desired Characteristic | Aerophone AE10 | EWI-USB |
|---|---|---|
| No built-in synth | Has synth | No synth |
| Touch-sensitive keys | No | Yes |
| Bb key on left hand pinky | Yes | No |
| Low latency | Yes | Yes |
| USB MIDI capacity | Yes | Yes |
| Wireless MIDI transmission | No | No |
| 5 Octaves | Yes. Octave buttons are good. | Yes. I don't really like the octave rollers |
| Compact size | Larger than I'd like | OK |
| Bite pitchbend | Yes, but control is not as good as I'd like | Yes, but not like a sax mouthpiece action |
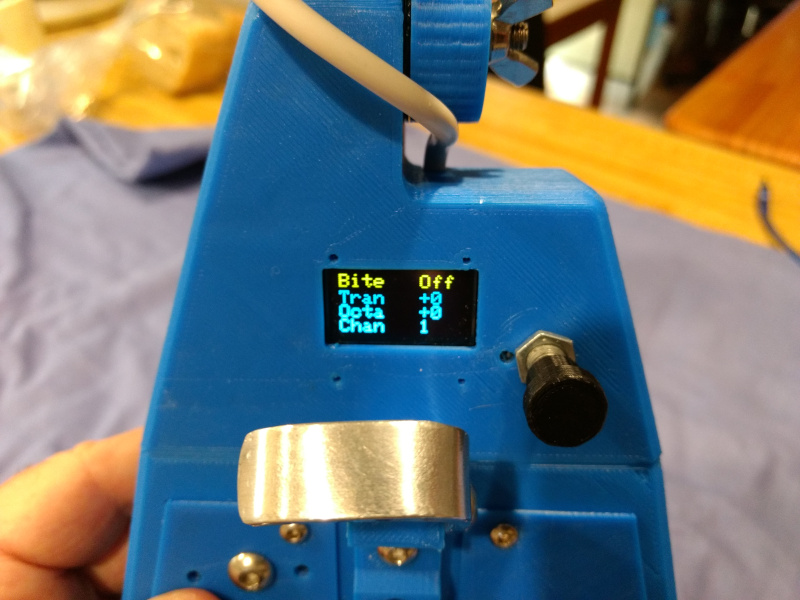
| Ability to adjust Transpose/Channel/Octave on the instrument | Yes | Only via a separate computer |
As you can see the features of the AE10 and EWI-USB were pretty close to what I was after, but they each let me down in a couple of areas. The AE-10 was too heavy, the keys were clicky, and although it had a sax-like mouthpiece function, I found it difficult to control. The EWI-USB was pretty close, but I didn’t like the mouthpiece action, and it I couldn’t adjust the instrument settings “on the fly”. With either of the instruments, if only one aspect had been an issue, I probably would have just put up with it.
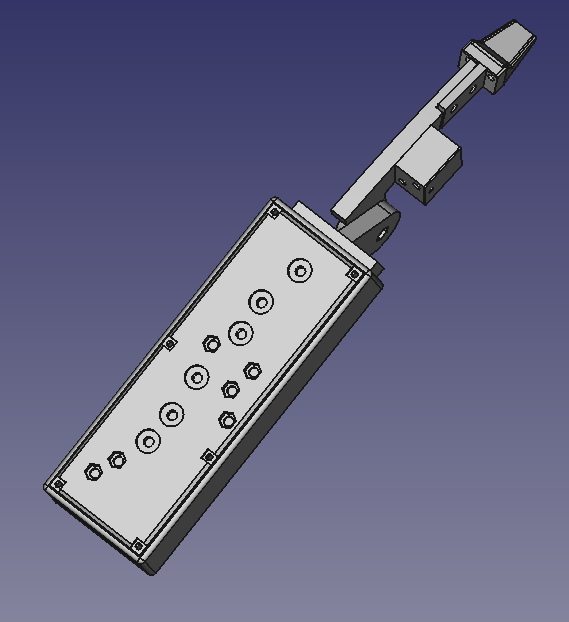
Mock-up
I made a mock-up to see what it might look like, using some timber and 3D-printed parts:
The pivoting neck seemed like a good idea to keep the instrument compact, and mounting the pressure sensor very close to the mouthpiece (orange box on the neck) would help reduce latency.
Body 1
I used FreeCAD to design the components, and the first body looked like this:
After printing, and assembling the main electronic components:
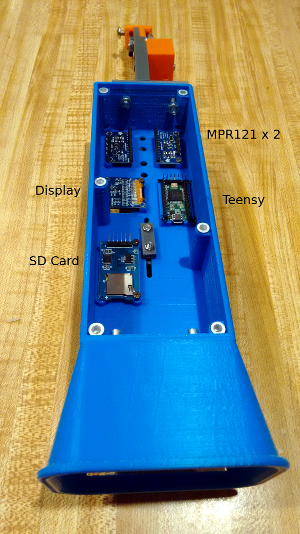
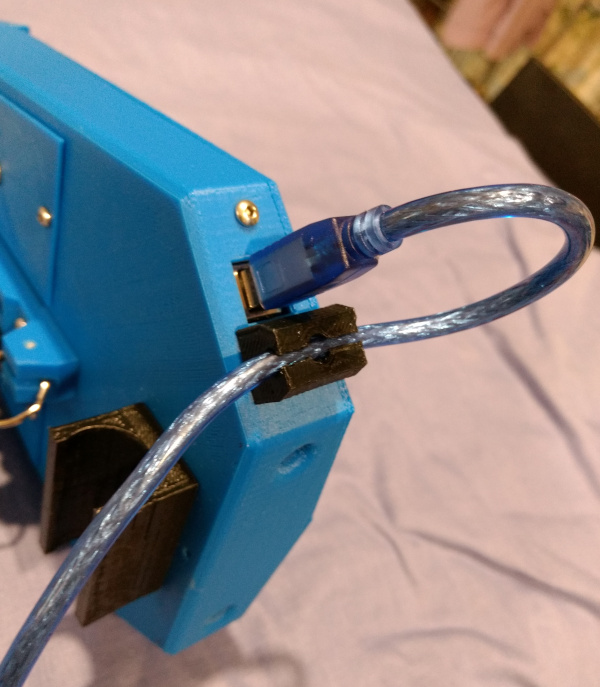
I decided to use a Teensy 3.2 for the processor, and two MPR121 capacitive sensor chip for the touch keys. Why? Well that’s what Johan Berglund uses in his NuRAD, so I figured it was a pretty safe bet. The Teensy has the ability to be a USB MIDI gadget, providing power and transmitting data at the same time. It would have been nice to have Bluetooth MIDI capability as well, but I couldn’t find a processor that had both the USB MIDI connectivity and Bluetooth. In the above photo you can see a SD card reader. I had planned to use that to store user configuration data, but then I found out that the Teensy can store that info as EEPROM data, so the SD card was not necessary.
Here is the unit wired.
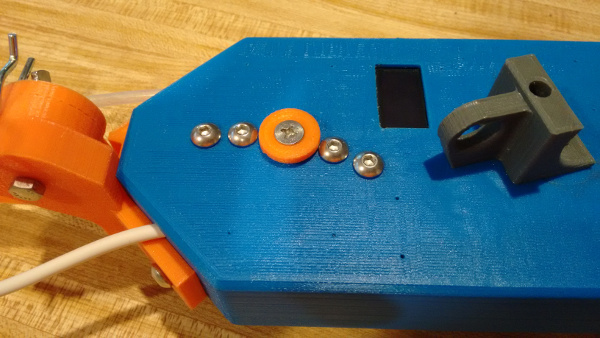
Body 2
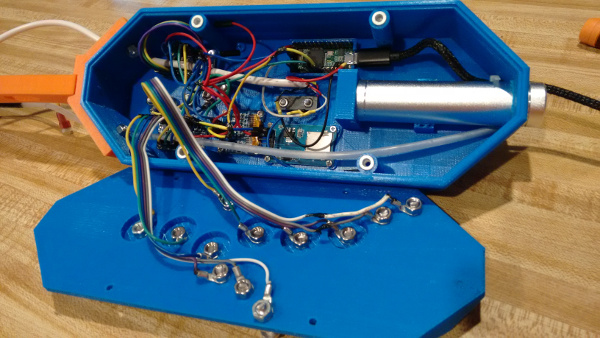
After playing around with the Body1, I developed a fully-functioning next version, which incorporated a powerbank battery:
Here are the internals. At this point there was no wireless ability – I was planning to incorporate a midiBeam transmitter, but hadn’t done so yet.
Body 3
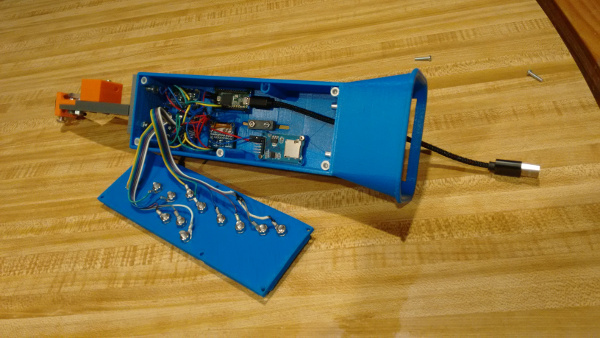
I used Body 2 for a while, but found the ergonomics lacking. Using screw heads for the pinky keys was not ideal, and the hand positions were a bit cramped. In addition, the powerbank was taking up a lot of useful space inside, so I decided to redesign the whole thing in the NuRAD side-by-side-hand arrangement:
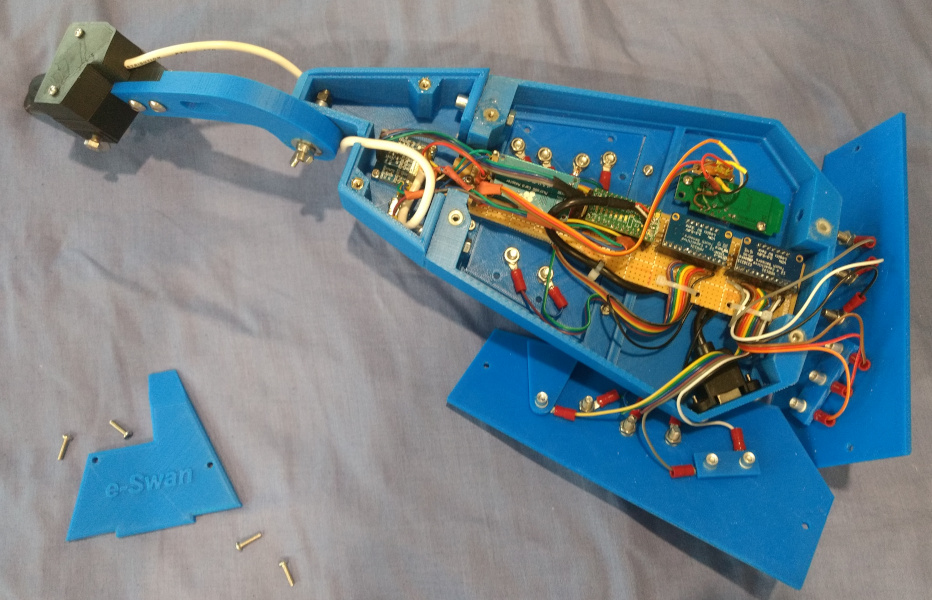
The pinky keys were made from stainless-steel teaspoon handles. I mounted the electronics on a central vero-board, which made wiring a bit easier.
I had previously bought a midiBeam system, so I decided to use that for wireless MIDI. I removed the midiBeam transmitter board from its original casing, disconnected the MIDI cable, and soldered wires from the Teensy serial port. I mounted the board inside the instrument casing (top right in photo below) and installed a switch. Wireless was used only when running with battery supply.
Body 4
After playing the Body 3 version for a while, it became apparent that the ergonomics of the side-by-side-hand arrangement was not for me. It made for a really compact instrument, but in practice I found it was difficult to hold. I finally gave up and decided to make it similar to an EWI. The problem with doing this is that the length of an EWI-like instrument is about 600mm, and my 3-D printer could only print about 240mm diagonally, meaning that it would have to be made in three parts. This would also mean that I had to design joints, etc. It suddenly became too hard…
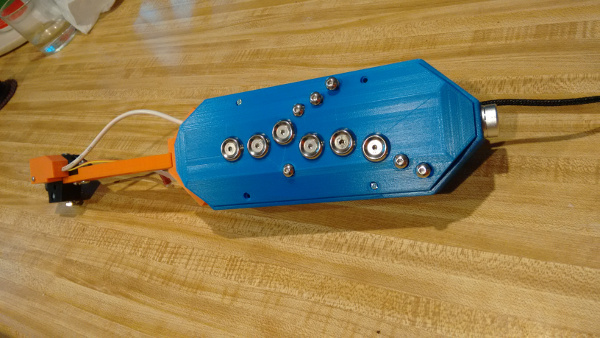
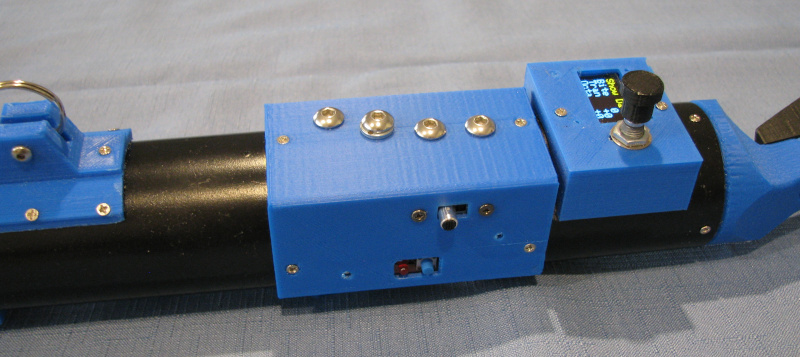
My solution was to use a 40mm PVC pressure pipe as the basic shell, and to add the high-tech bits as screw-on fittings. It is easy to design and make the 3-D panels fit to a curved surface. So I took the basic key arrangements from Body 3, and adapted them to the curved tube. Ideally a smaller diameter tube would have been better, but the “chips on a strip” electronics wouldn’t have fitted, and I didn’t like trying to miniaturise that.
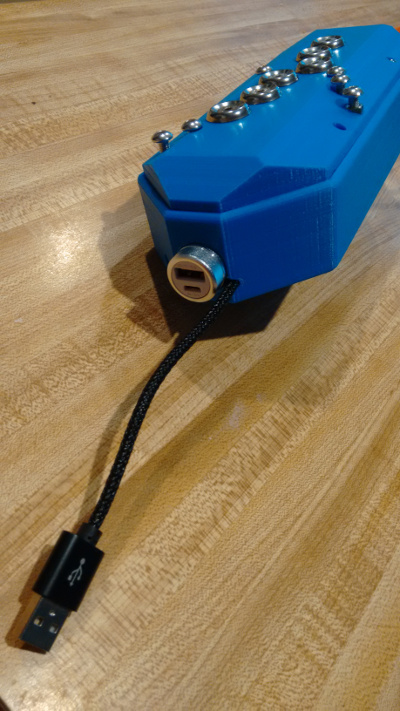
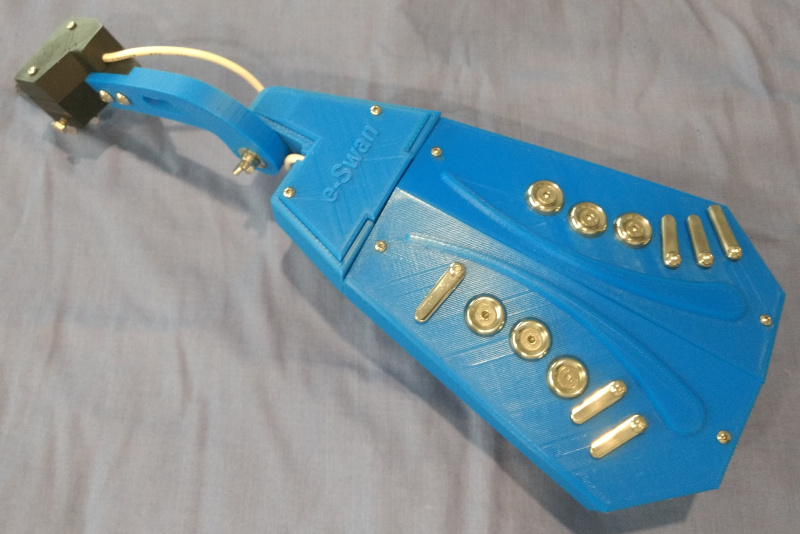
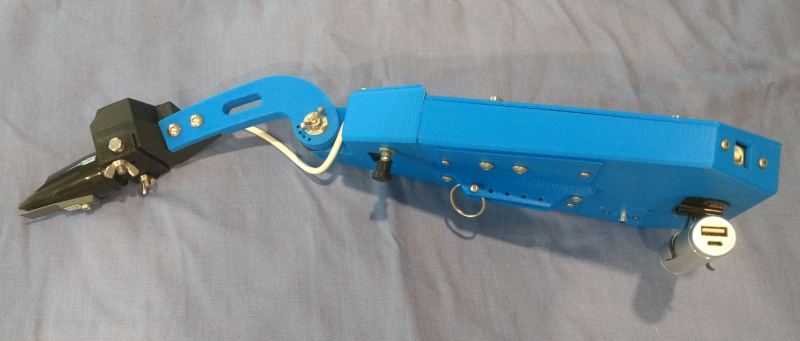
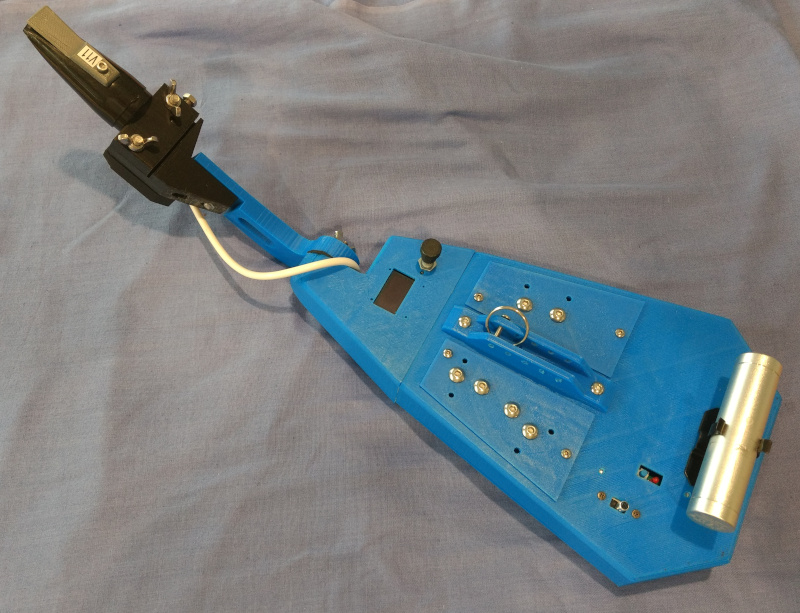
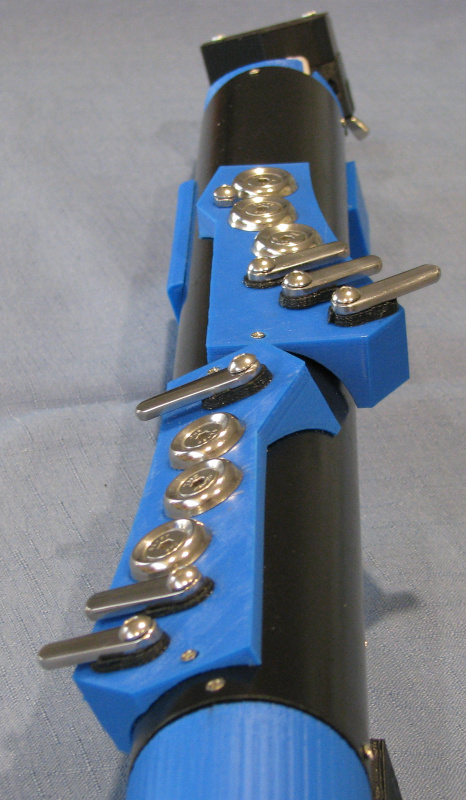
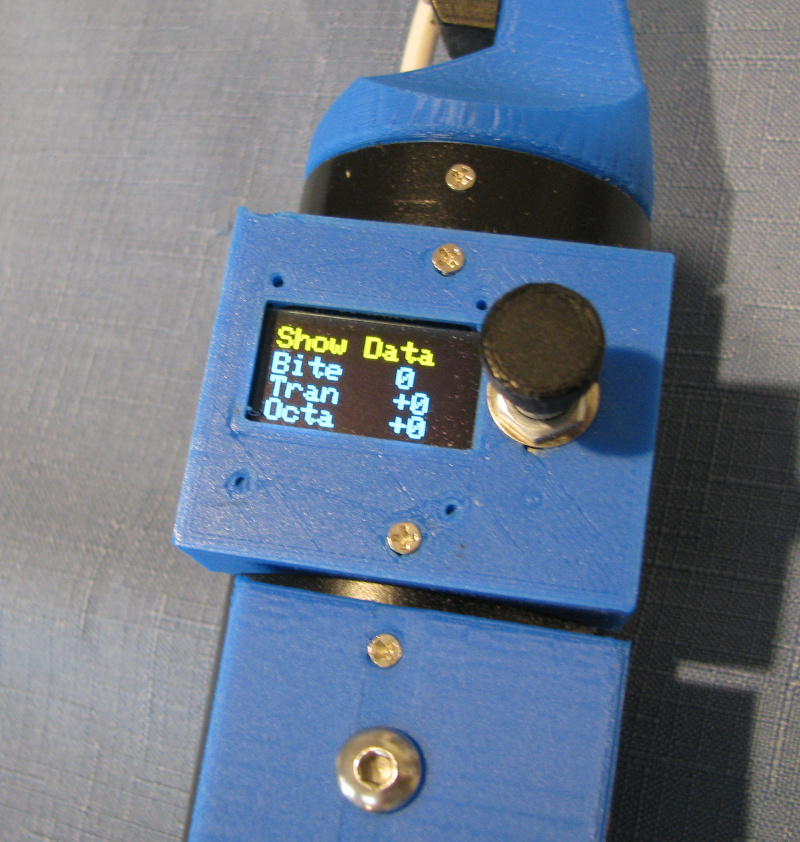
So, here’s the result. I ditched the folding neck, as it wouldn’t have saved much length. The left- and right-hand key panels are at an angle to each other in the same was as they were on Body 3. It feels more comfortable with the large diameter of the pipe, and it’s a bit saxophone-like. I’ve now called it “midi-Sax“.
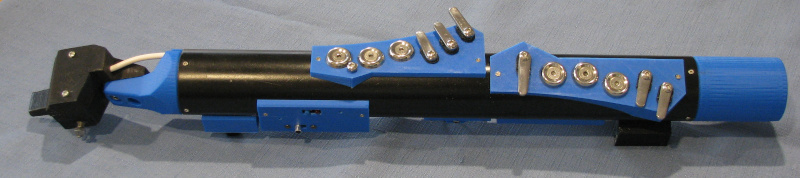

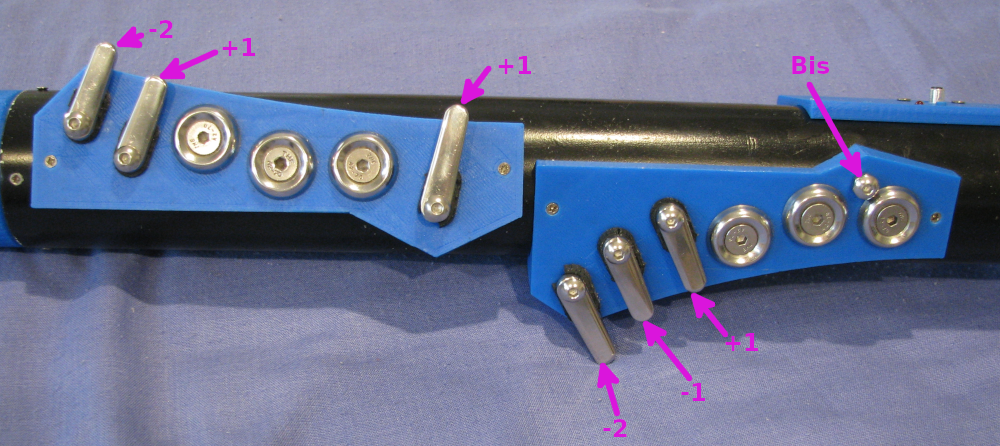
^The photo above shows the key functions.
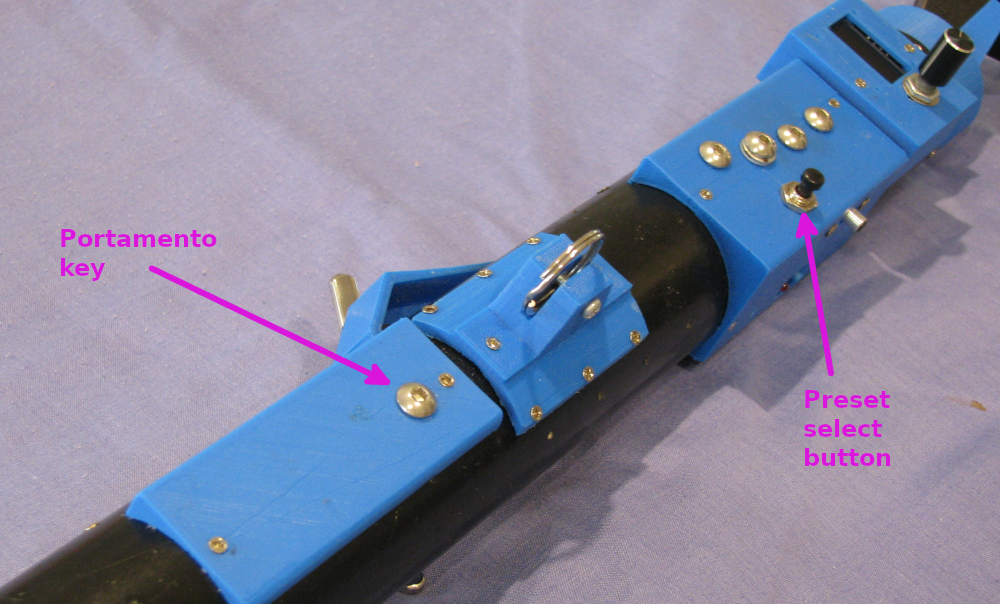
^ Special keys for triggering portamento and for quick selection of presets

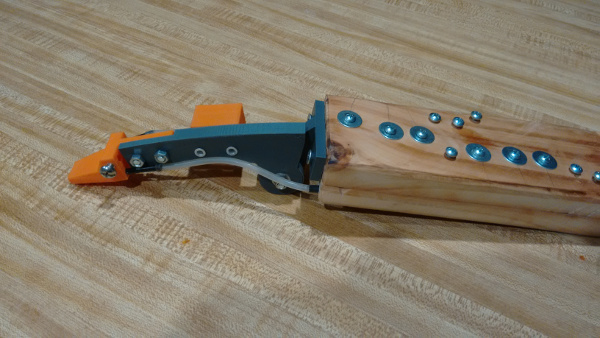
Mouthpiece
Some discussion of the mouthpiece is appropriate. Shown here is the latest version. It’s not shown on all the photos above, as I hadn’t developed it when I took them.
I’ve used a commercial mouthpiece from a Roland Aerophone AE-20, and built a system that takes the air pressure and provides reed pitchbend.

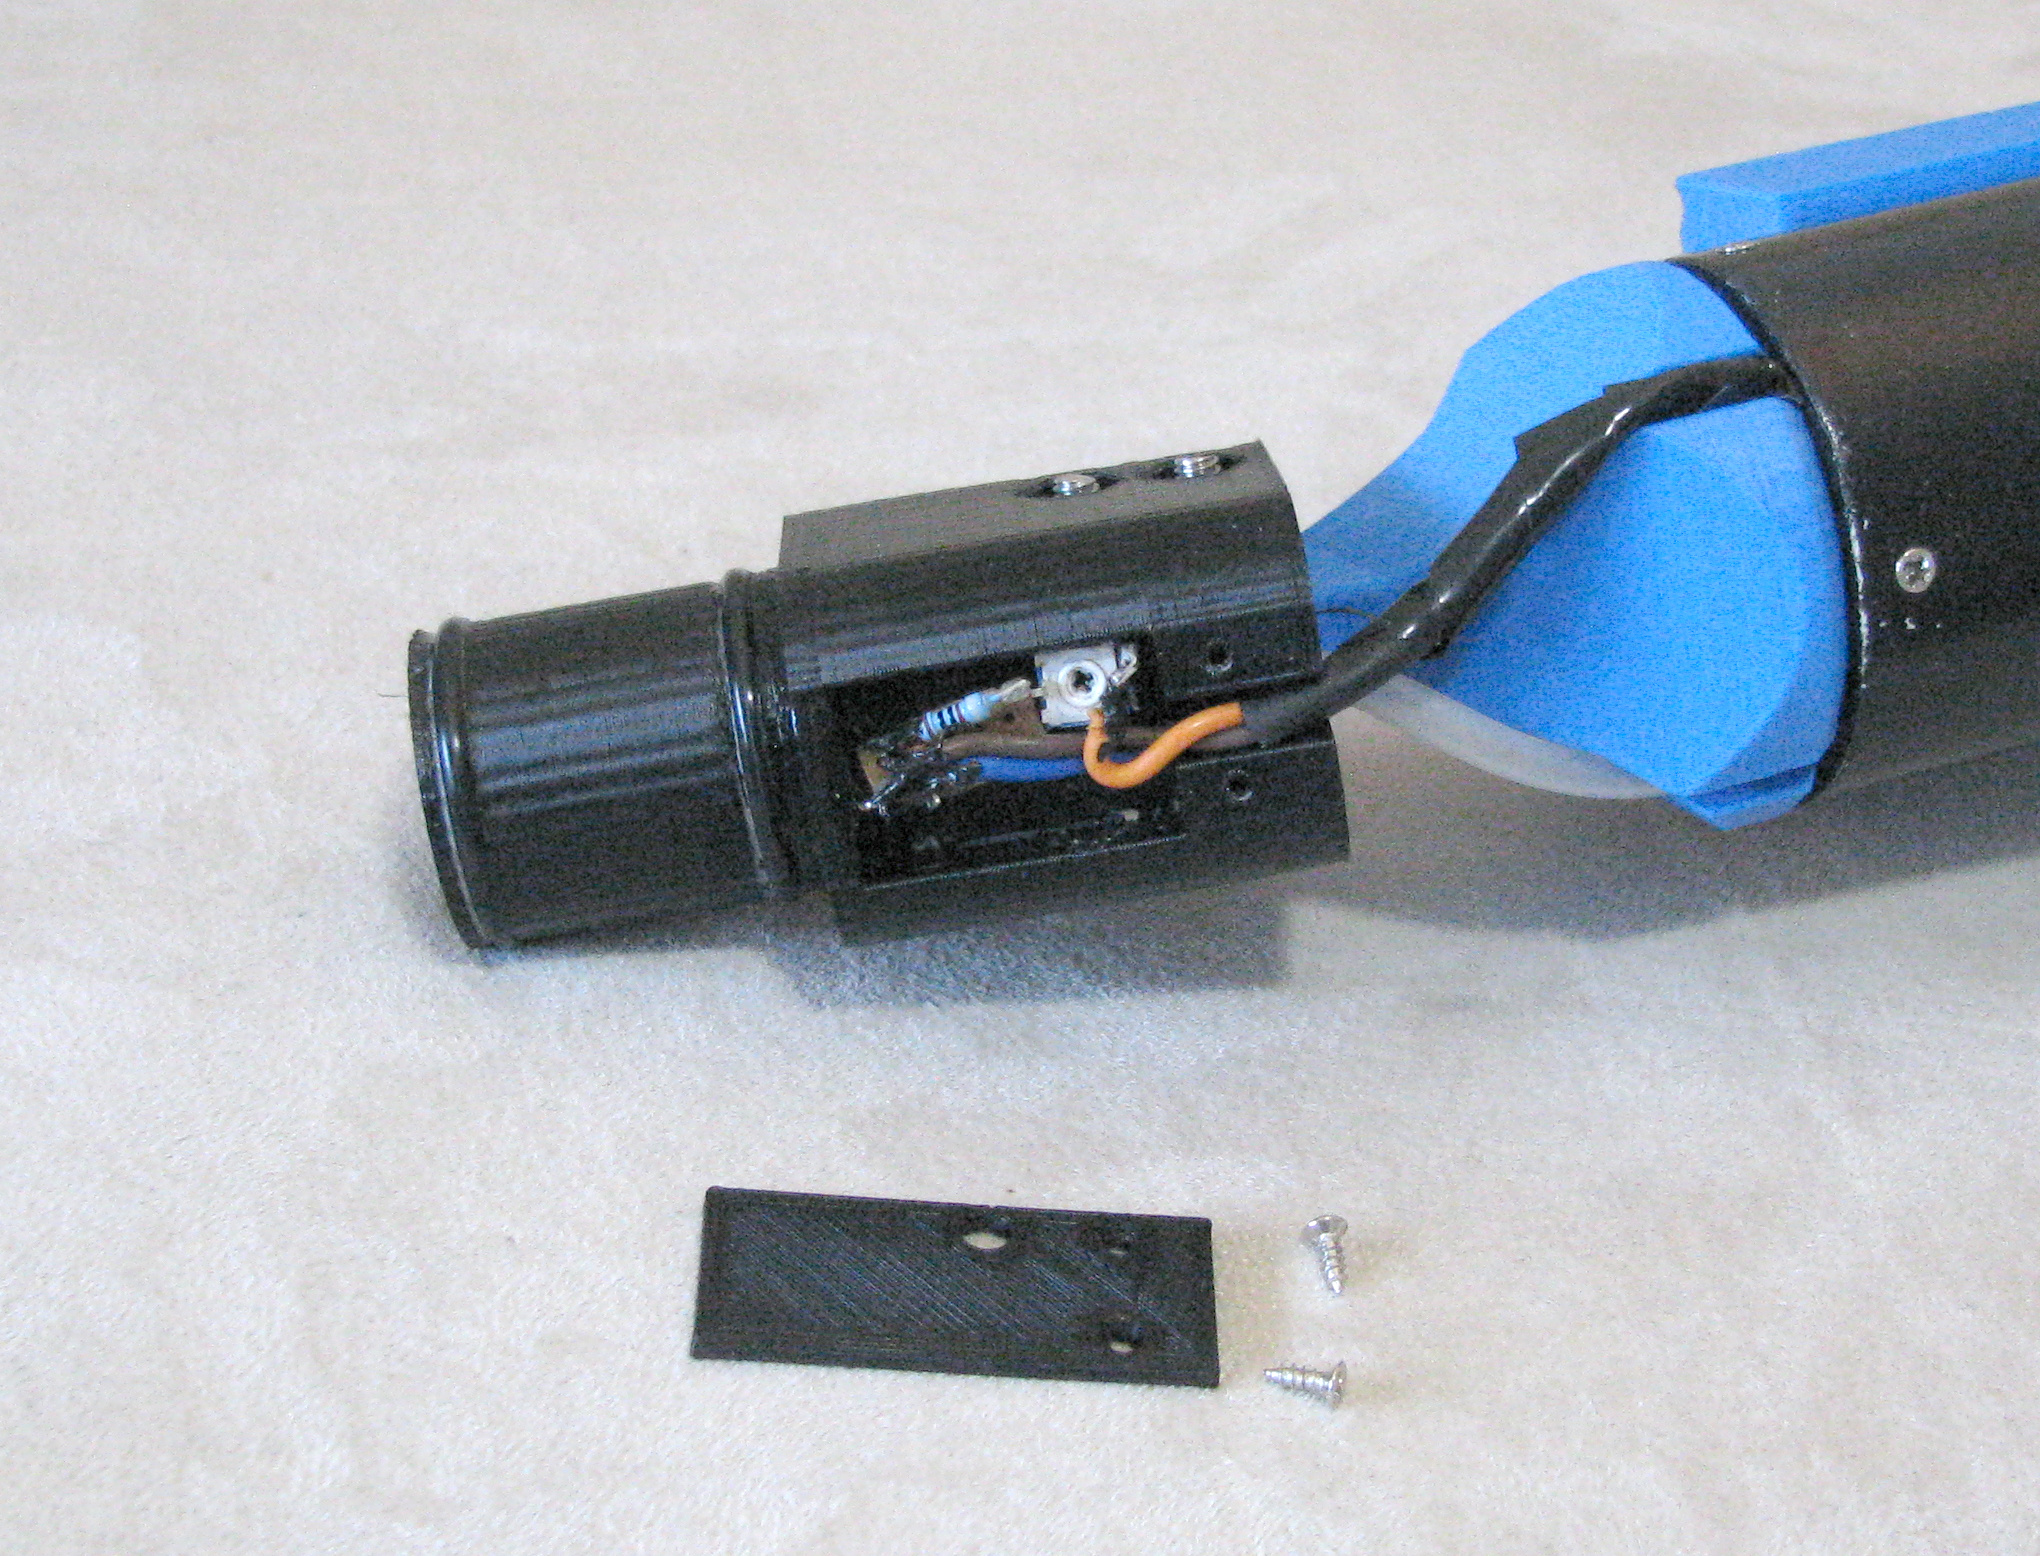
The photo above shows the mouthpiece attached to the instrument.
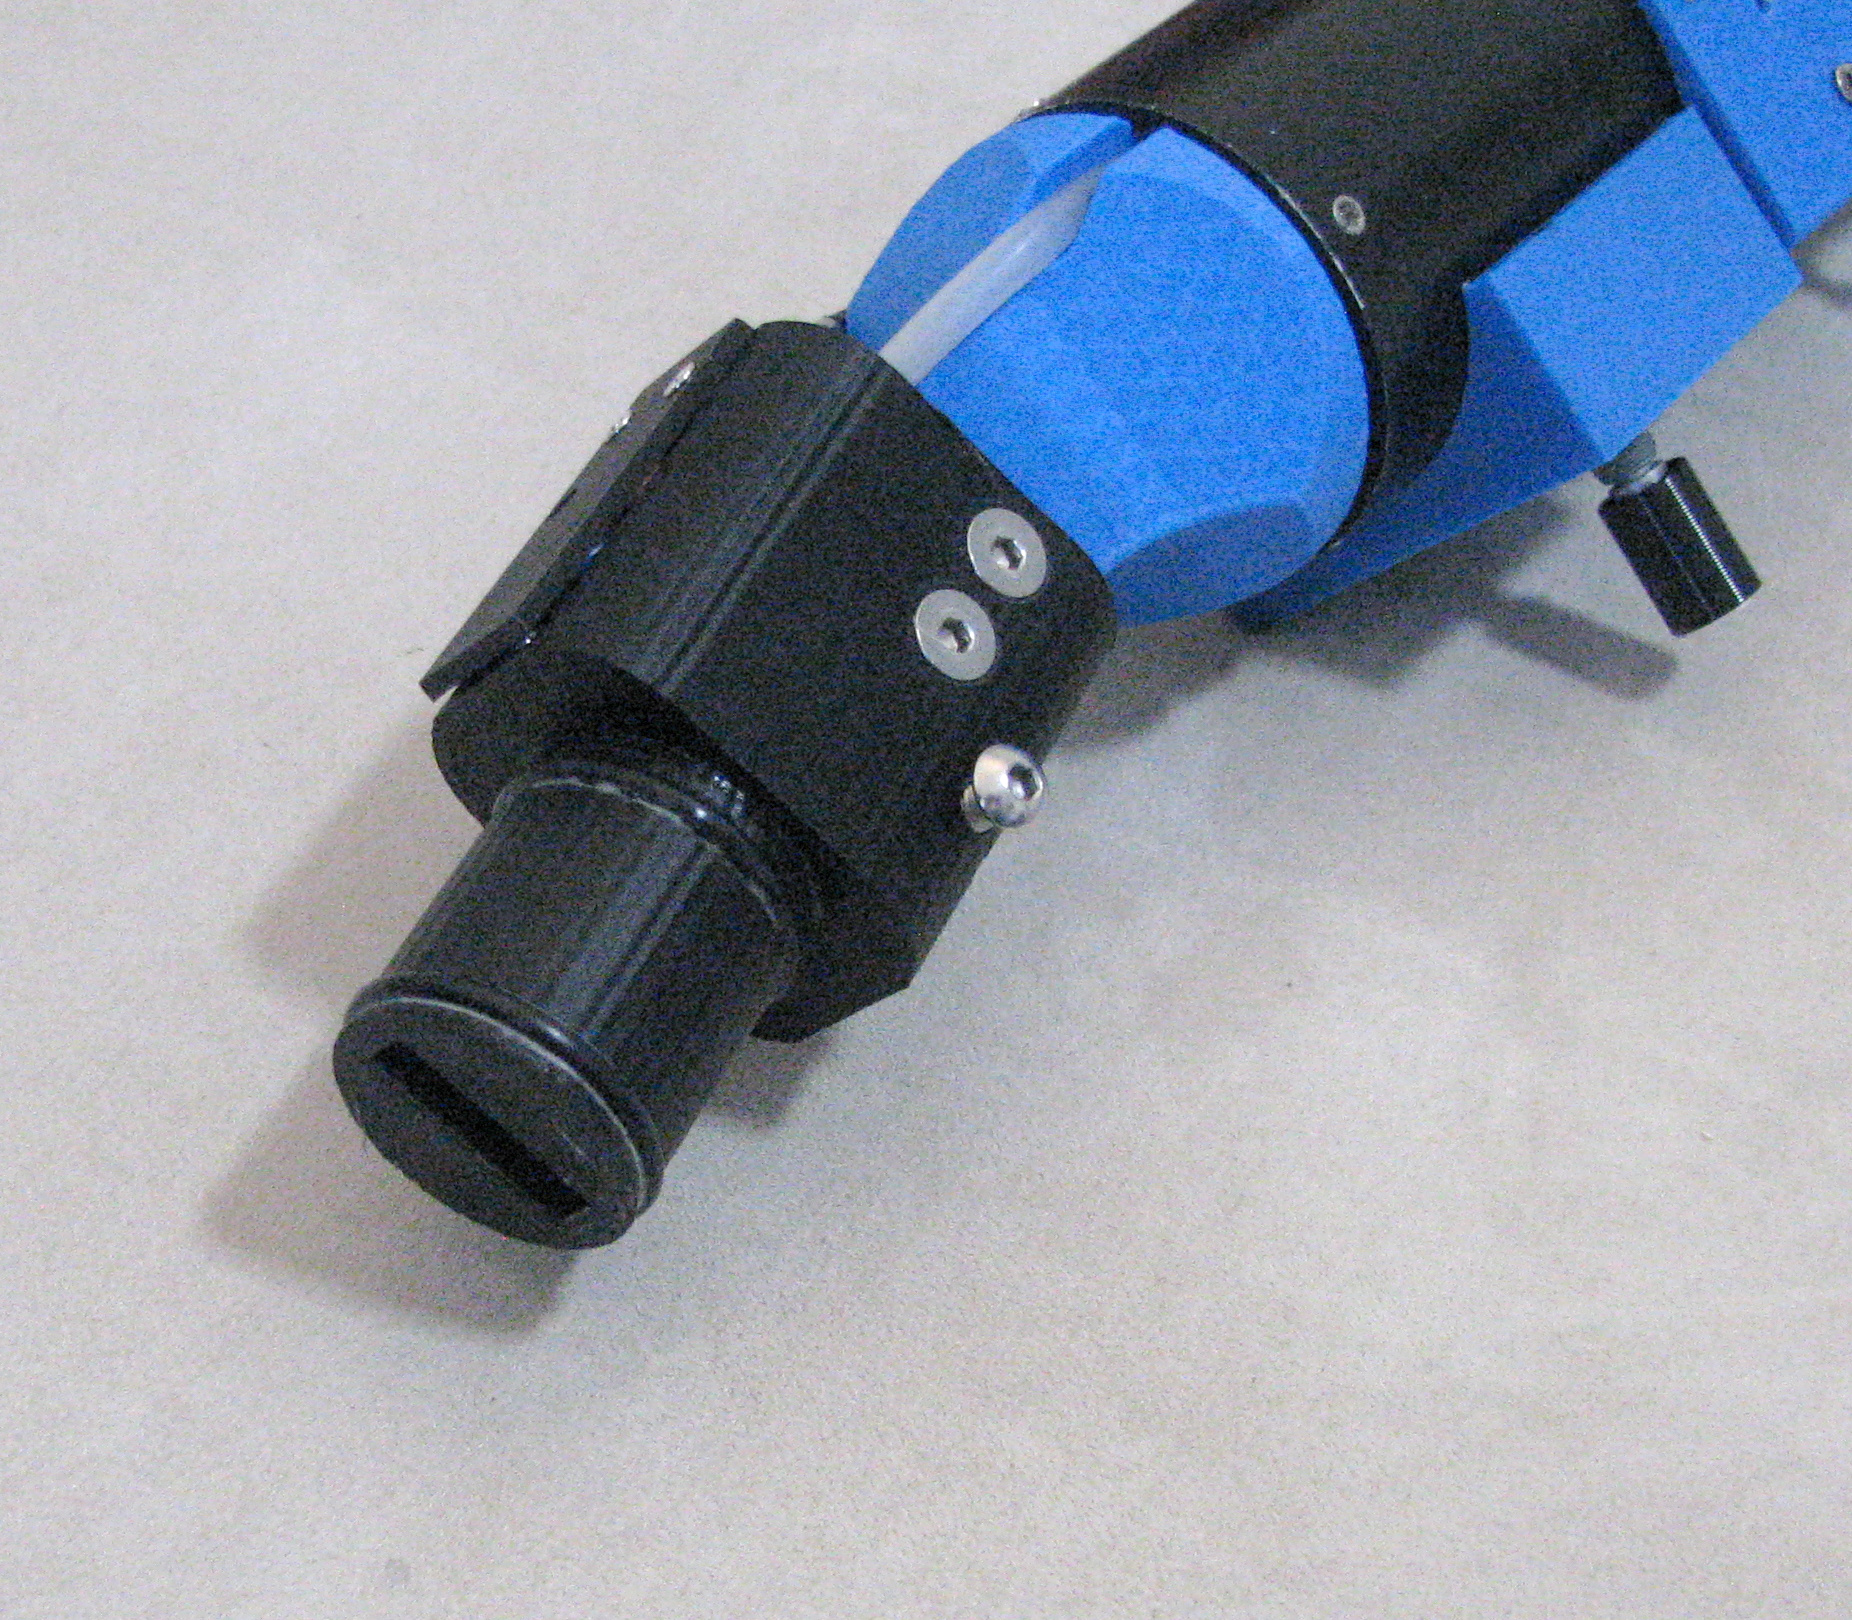
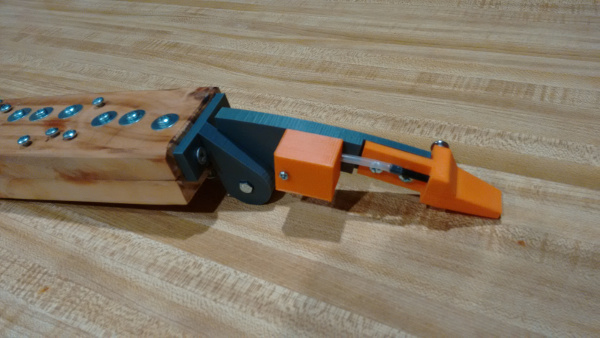
The photo above shows the mouthpiece holder with the mouthpiece removed. There are o-rings to seal the mouthpiece, and a slot for the air and pitchbend mechanism. The mushroom head socket screw is used for adjusting the back-pressure. The air comes out a small hole immediately below that screw.
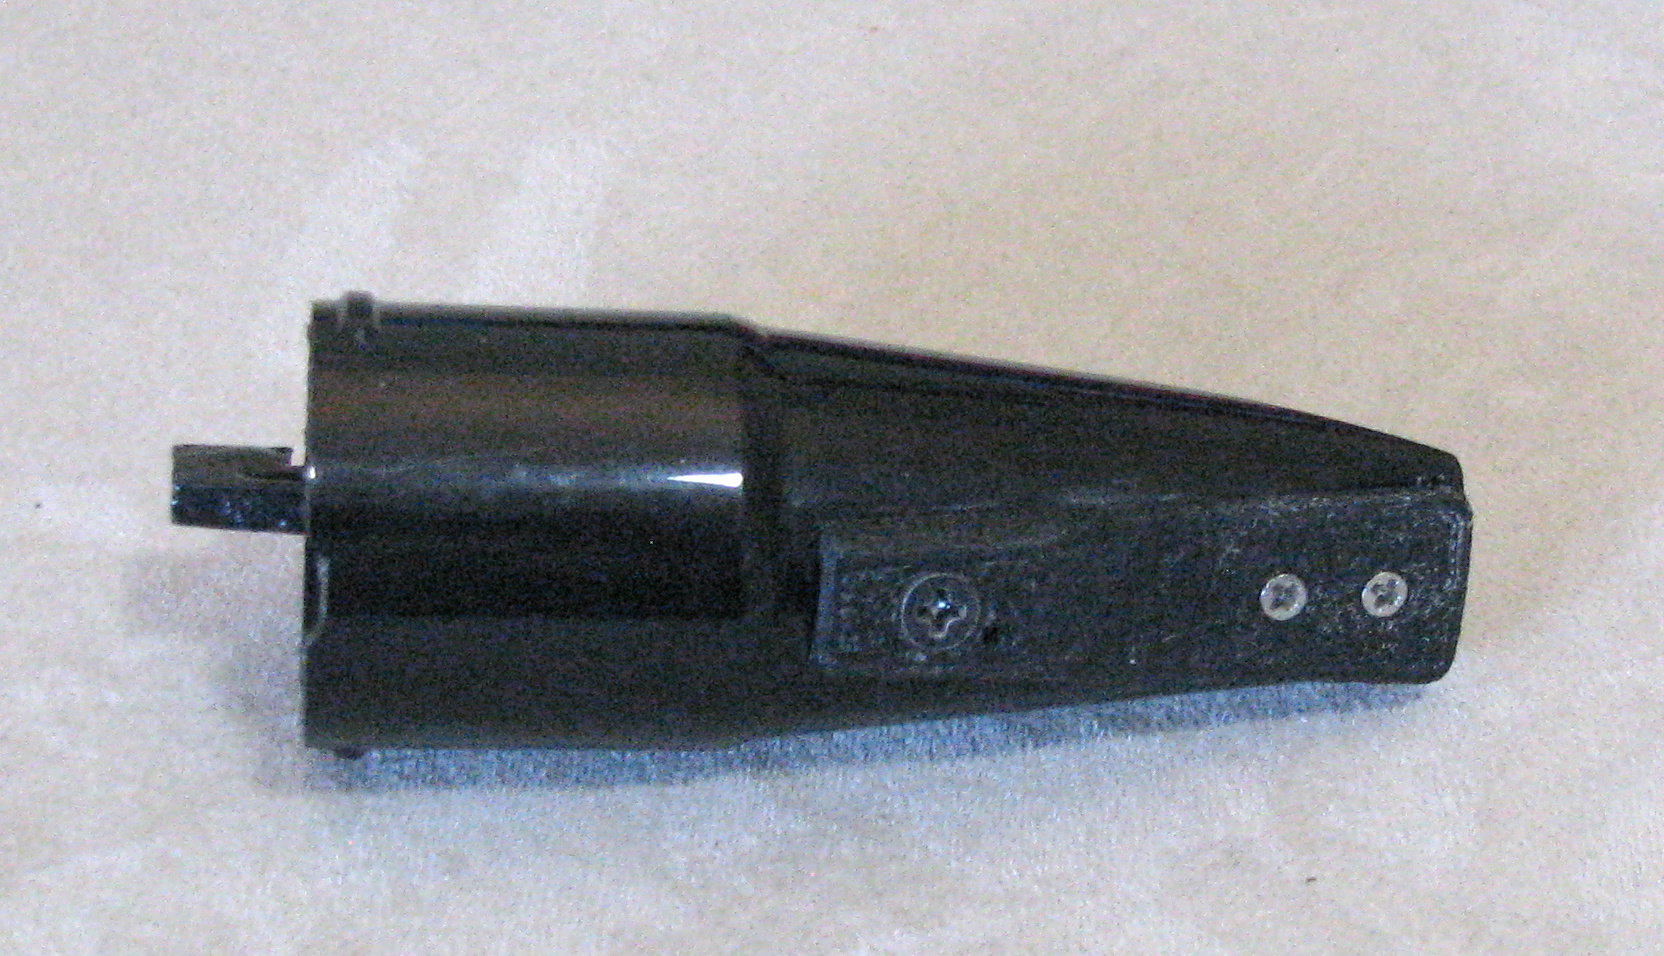
This is the mouthpiece with the pitchbend mechanism extending out to the left. The mechanism is shown in the photo below, and consists of an 3-D printed arm screwed to the 3-D printed reed.
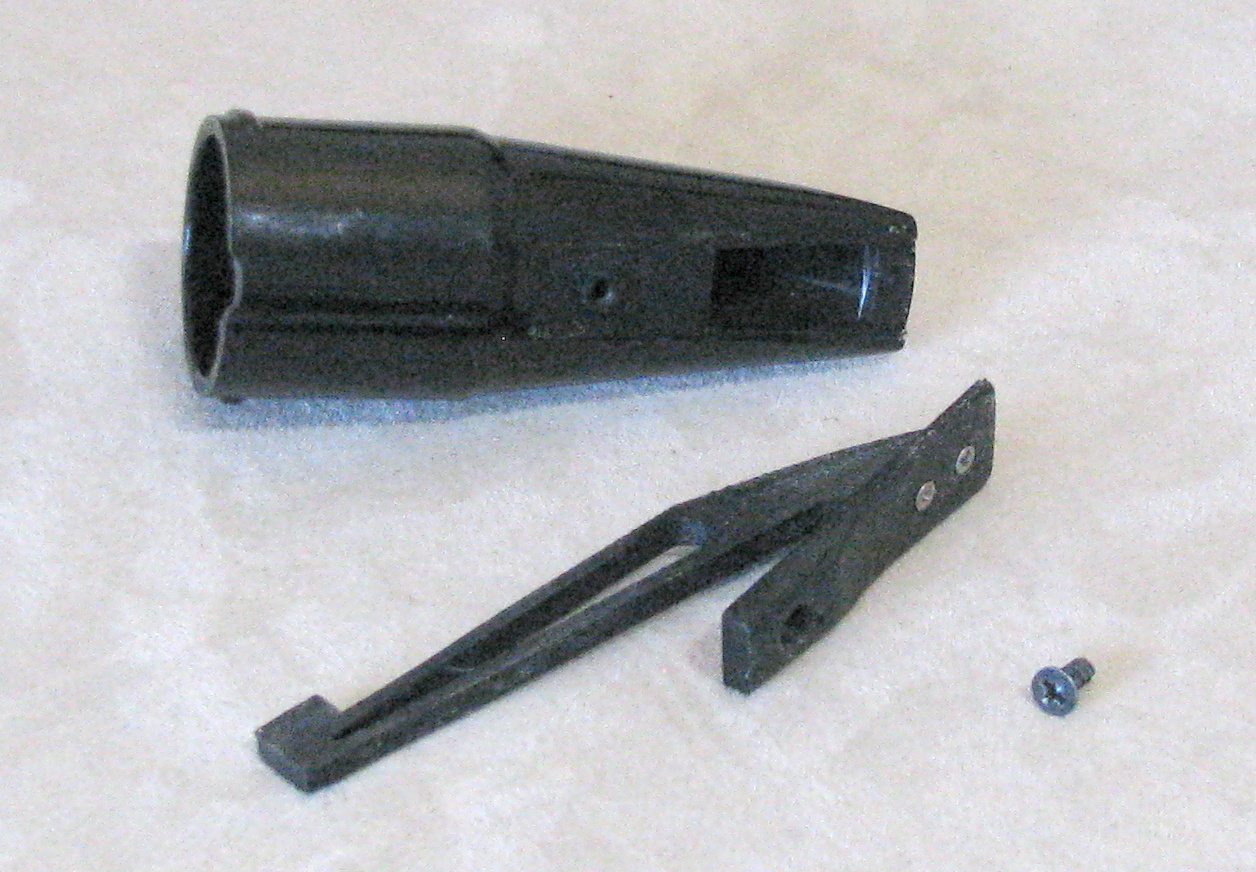
The arm moves when the reed is closed – see the video below:
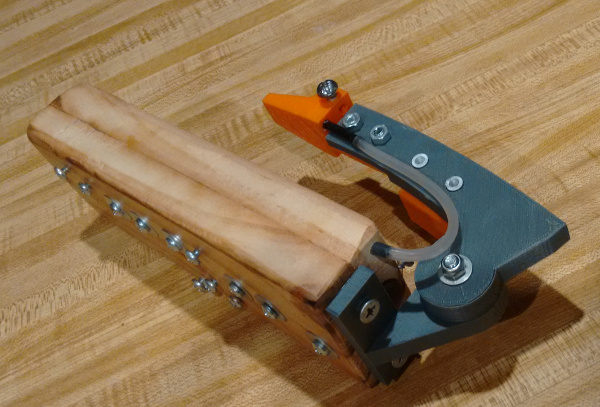
Inside the mouthpiece mounting is an optical sensor (QRD-1114) that detects the position of the arm and adjusts the pitchbend – see photo below:
A surprising side-effect of using 3-D printed components for the mouthpiece is that, because of the material’s inherent thermal resistance, the mouthpiece produces almost no condensation, so there is no need to run a drain hose down through the instrument as you see on many commercial offerings.
Tech Info
Here’s a summary of the technical data:
| Item | Details | Comments |
|---|---|---|
| Processor | Teensy 3.2 | |
| Touch sensing chip | MPR121 x 2 | Need to run the I2C at 1MHz to keep scan times low. Thanks to Johan Berglund for help with the programming for this |
| Average program scan time | 1.5msec | |
| Display | SSD1306 | 128x64. Configuring the I2C correctly is critical to getting this to play nicely with the MPR121s |
| Pressure sensor | MPX5010 | 5V, 10KPa |
| Mouthpiece pitchbend sensor | QRD-1114 optical | LED sender intensity adjusted by variable resistor |
| Wireless MIDI | MidiBeam | Need to put the on/off switch on the earth, not the +ve, to make this work properly |