Updated 17 May 2019
For those who have a Roland Aerophone AE-10, you’ll know of all its great features. On thing it doesn’t have is a wireless MIDI facility. A friend on the Patchman Wind Controller forum wanted to fix this deficiency, and I offered to help. Together we worked out what was needed, he bought all the components, and I put it together.
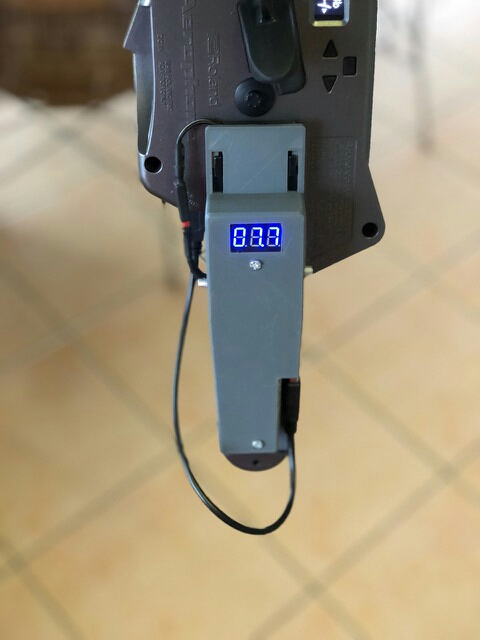
Here’s the result:
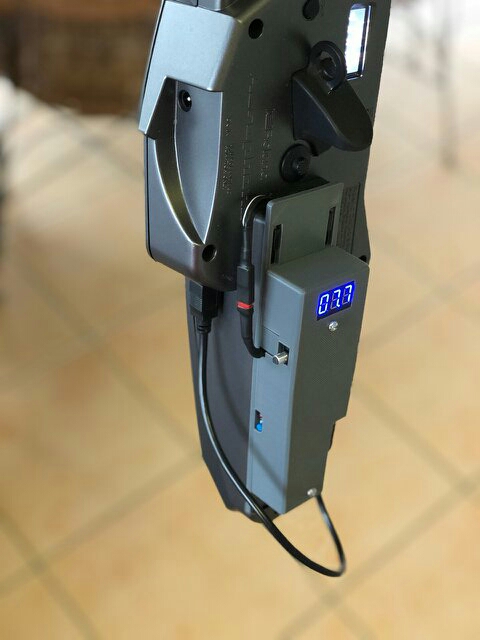
This is a module that includes:
- A midiBeam transmitter
- A USB-MIDI host
- Connection to the AE-10’s batteries
- A voltage display
- A voltage converter to provide 5V for the host
- A voltage converter to provide 3.3V for the MidiBeam
- Switches to turn it all on and off
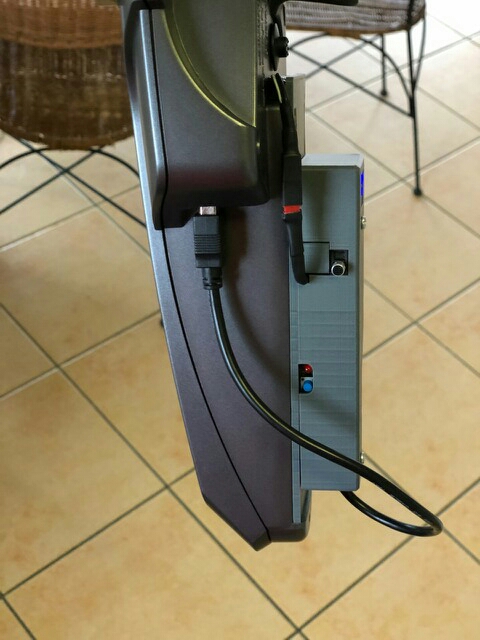
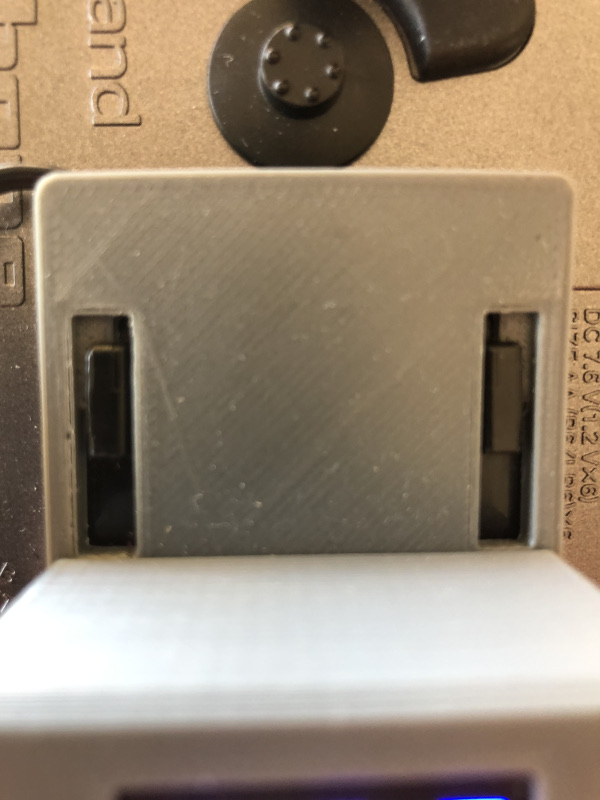
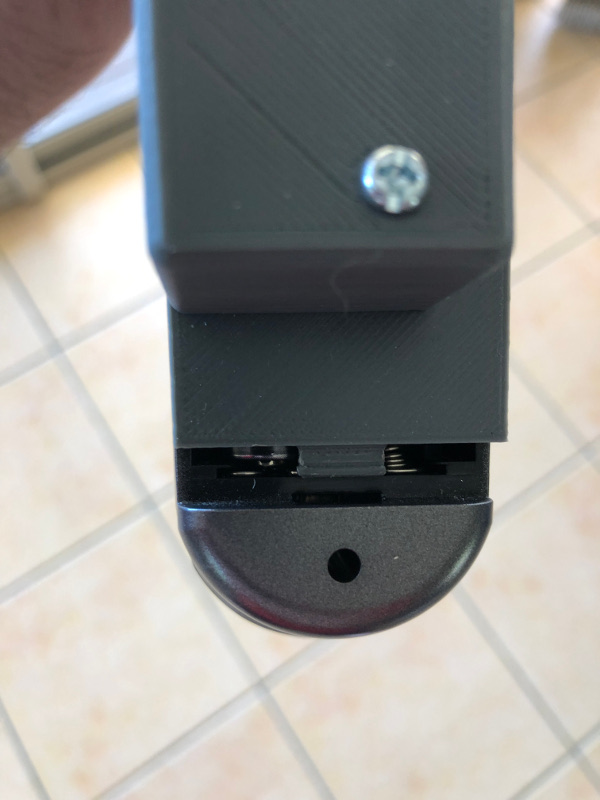
The module clips on the battery cover mountings (after first removing the battery cover), and the connection to the batteries is a simple clip-on arrangement. No surgery on the AE-10 was needed.
It was designed to be compact and easy to use. If you want to use the AE-10’s internal synth and not the MIDI out, you just turn off the module, and plug into the audio socket. The whole unit stays connected.
The Circuit
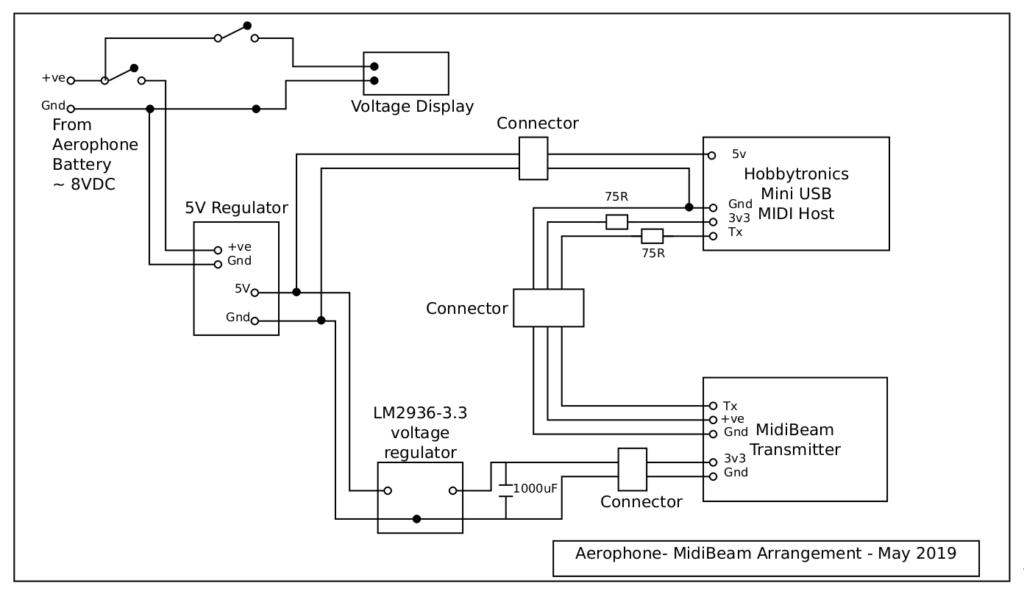
The USB Host
The AE-10 doesn’t have a DIN MIDI socket, so a USB-MIDI converter was needed. Fortunately Hobbytronics in the UK make a mini USB host that can be programmed as a MIDI device. It works really well, and is tiny.
The MidiBeam
The midiBeam transmitter only comes in a DIN MIDI plug arrangement (hence the need for a USB-MIDI host), and there really wasn’t room for a DIN plug/socket arrangement in the module, so the DIN plug was removed and replaced with a small multi-pin plug. The unit runs on two AAA batteries (nominally 3V), but there wasn’t room for them in the module either, so a 5V-3.3V converter was added. Unfortunately, the midiBeam has a high in-rush current on starting (resulting in a connection failure) A 1000uF capacitor fixed the problem.
The Voltage display
Why a voltage display? Well the AE-10 has a low voltage warning, but it only comes on just before it dies. The voltage display shows how much is left in the re-chargeable NiMH batteries and gives a good indication of how long you’ve got before needing to change them. The right-hand switch turns on the display independently of the instrument and the midiBeam. An additional reason for having the display is that the module increases the power use by about 15%, so the battery life reduces accordingly.
The Package
The module casing is 3D printed in PLA. It is made in two pieces, and with the cover off it all looks like this:
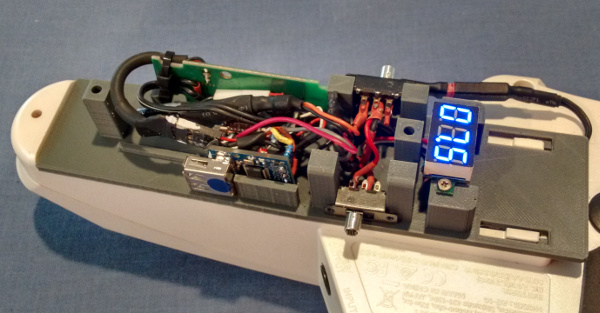
The photo above shows it on my (white) AE-10. The baseplate of the module extends over the battery connectors (to the right, above) so that you can’t accidentally touch them with something metal – there’s no fuse, and the current could be high if a short-circuit occurred. The midiBeam and the USB host circuit boards are mounted on their sides so as to create space for the wiring and the voltage converters.
The cover has holes on the sides for the switches, the USB host LED, and for the midiBeam pairing button and LED.
The whole module can be removed from the AE-10 in under a minute, and the battery cover can then be clipped back in place. The module needed to be easily removable because, unfortunately, with the the module attached the AE-10 won’t fit in the the Roland case for transport.
More Photos: